

How To Read Windows 7 Minidump Files
How to Use a Minidump File to Gear up Your Windows BSOD
Information technology finally happened. Out of the blue, you lot're enjoying a game, watching a movie, or just reading on the cyberspace, when your operating system decides it doesn't want to cooperate and suddenly you're facing downwardly a BSOD or Blue Screen of Death. A BSOD is something that no Windows user wants to run across, because it means that your system has crashed, costing you fourth dimension and perhaps even resulting in information loss.
Perchance the worst thing nearly getting a Blueish Screen of Death is that it could be the effect of any number of issues, from a faulty piece of hardware to a driver error to having a page mistake in a non-paged area (a result of a file non being found in memory). However, all isn't lost and we're going to show you how to enable and use a minidump log file to diagnose the problem.
Why Y'all Need a Minidump File to Diagnose Your BSOD
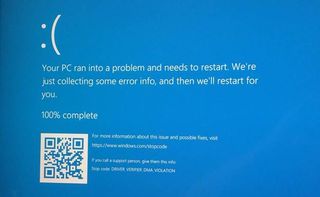
In before versions of Windows, the BSOD showed you some error codes that were at least a little bit helpful. However, in Windows x, the screen gives y'all a stop code you can write downward and research and a QR code you can employ with your phone. However, this only sends you to the Microsoft website and provides a description of certain error codes.
What we observe useful is configuring Windows to save a file that contains lots of information regarding the BSOD and how nosotros tin can go about fixing the fault. This is called a minidump file.
How to Configure Windows to Save a Minidump File.
Past default, the option to create a minidump file is not enabled so you'll need to plough it on. Do this now, fifty-fifty if yous don't take a BSOD problem, because otherwise y'all won't have a log when the crash happens.
1. Navigate to the System Properties Command Panel bill of fare. Y'all can get at that place past typing "sysdm.cpl" into the Windows search box. Or by going to Settings->System->Virtually and clicking Advanced system settings.

2. Select the Avant-garde tab.
iii. Enable the post-obit options:
● Write an event to the arrangement log
● Automatically restart
● Writing debugging information -> Small retention dump (256kb).
With this enabled, whenever Windows crashes, the minidump file will be created under "%SystemRoot%\Minidump". Y'all tin can also change this location if you cull to. However, if you lot practice, keep in mind that about programs to troubleshoot the minidump logs are set to look for this location by default. And so information technology's best to leave it as it is. This besides translates to C:\Windows\Minidump.
How to Read the Minidump, Run across What Caused Your BSOD
Now that the minidump is configured, you'll demand to download an application that can read the file and provide useful data. A tool chosen BlueScreenView comes recommended for doing just this.
You can download BlueScreenView by going to the official website and selecting either the 32-bit or 64-bit version of the application.
Afterwards downloading the tool, yous'll need to excerpt it to a location, and then it tin exist run.
Once the tool is extracted to a directory, double click the "BlueScreenView" icon to go started. BlueScreenView will then look at the default minidump location and will look through the electric current logs that have been created. If yous've experienced a number of issues or haven't removed older minidump files, yous'll need to exist mindful of the dates associated with the logs.
Using BlueScreenView to Understand Minidump Files
When you first use BlueScreenView, it will provide you lot with several pieces of information and at first, it may seem disruptive. Notwithstanding, the format is straightforward and it does highlight the important information to get you started.
The files or applications that acquired the crash will be highlighted in red, giving you a good idea of where to starting time correcting the result.
In this screenshot, nosotros tin can see that on this specific minidump, there was an issue detected that affected three files; dxgmms2.sys, ntoskrnl.exe and watchdog.sys.
Further on the upper panel, we tin can see in the right column that there'southward a department that tells us what caused the crash. In this image, we can see that the watchdog.sys caused the trouble. This is a adept starting point as you tin can now check Google or Bing, to come across how this could go a trouble and possible solutions.
We know that watchdog.sys is the potential crusade, but what about dxgmms2.sys and ntoskrnel.exe? Every bit those were the affected files, nosotros demand to find out what those are besides. So those volition besides need to be looked into. Doing a quick bank check on Google, we can see that dxgmms2.sys is related to the Windows DirectX drivers, while ntoskrnl.exe is the operating arrangement kernel executable - responsible for keeping the operating organisation running.
Using this view of the Windows minidump file, we can deduce that the BSOD was probable caused by a graphics commuter upshot, which tin can typically be corrected past installing a newer version of the driver or reinstalling the current driver.
What If The Minidump File Shows A Hardware Error?
While driver problems are normally easily fixed, a BSOD that is a consequence of failed hardware is a different story. Such an example is the FAULTY_HARDWARE_CORRUPTED_PAGE mistake. Here, you would still use an application such as BlueSceenWindow to find the crusade of the error. However, when a hardware error occurs, in that location's non a magical gear up that volition right this. For this specific error, we're going to say that the result of this error was due to an installed memory module.
To figure out if this is the actual cause, nosotros'd have to test the retentiveness. In that location are several ways to do this; using a hardware memory checker or an awarding. Seeing how most people don't have access to a physical memory checker, nosotros'll opt for the application road. Thankfully, Microsoft has included a memory diagnostics tool that has been included dating dorsum to Windows 7. To use this, open up a run prompt and type "mdsched".
You'll have 2 options to cull from; Restart Now or Cheque for problems the adjacent time you lot start my calculator. If you choose the start selection, be certain to save your piece of work as Windows volition close out.
Once your figurer restarts, the retentiveness checker will load and offset checking your memory. Depending on how much memory you have installed, the process can accept a while. While the examination is running, y'all'll see a progress bar and an overall status. Any errors that may be encountered volition be displayed nether the status department.
In one case the test is completed, the retentiveness examination volition boot into Windows. If at that place are no errors, you can conclude that your retentiveness is not at fault.
Source: https://www.tomshardware.com/how-to/minidump-fix-blue-screen-of-death
Posted by: mundyacto1941.blogspot.com
0 Response to "How To Read Windows 7 Minidump Files"
Post a Comment